”I may need to make a few changes to the timetable between now and the school opening day. If I publish the timetable will all staff be able to view it?”
The answer to this is… no, not if you don’t want them to view it.
This is a question we get asked a lot during the summer months when schools are busy preparing their timetable file for the coming year. Below, we have outlined how academic years work in conjunction with your timetable file. Understanding the movement between years is crucial in making sure things go smoothly in late August or September when the files are released to all staff and pupils.
How does it work?
First, remember that when publishing a timetable, you must be in the current academic year and publishing does not automatically change the academic year forward for you.
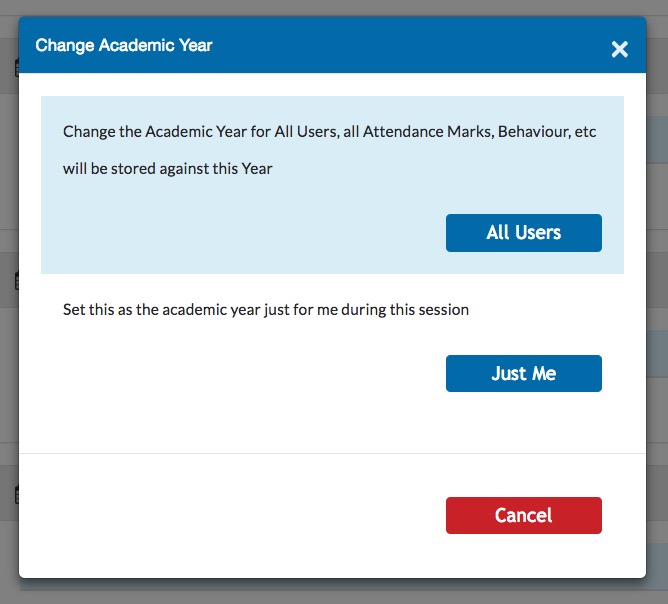
When you are finished with your timetable, you must move into the next academic year in order to view it in VSware. When changing years, you will have a choice to move forward as ‘All Users’ or ‘Just Me’. This is explained further below.
To view the timetable privately before making it public to other users, select ‘Just Me’. Only you will see the new timetable, even if other users are logged in at the same time. This is a very helpful feature because it allows you to make changes until the timetable is just right without others viewing it.
It is not until you have a) published your timetable from the current year into the next year, and then b) moved forward a year using ‘All Users’ that the new timetable becomes visible to all staff and students. So it follows that you should only ever use the ‘All Users’ button when you are confident that your timetable is complete.
Note: the ‘Just Me’ setting is temporary. If you have moved forward a year using ‘Just Me’, logging out and then back in again will move you back to the current year.
If this is your first publish of the year, you must publish from the current academic year into the next academic year. Once you have already published, you can remain in the next academic year and continue to publish into that year. In other words, you don’t have to repeatedly go back to the current year to republish multiple versions of your file.
How move to the next academic year?
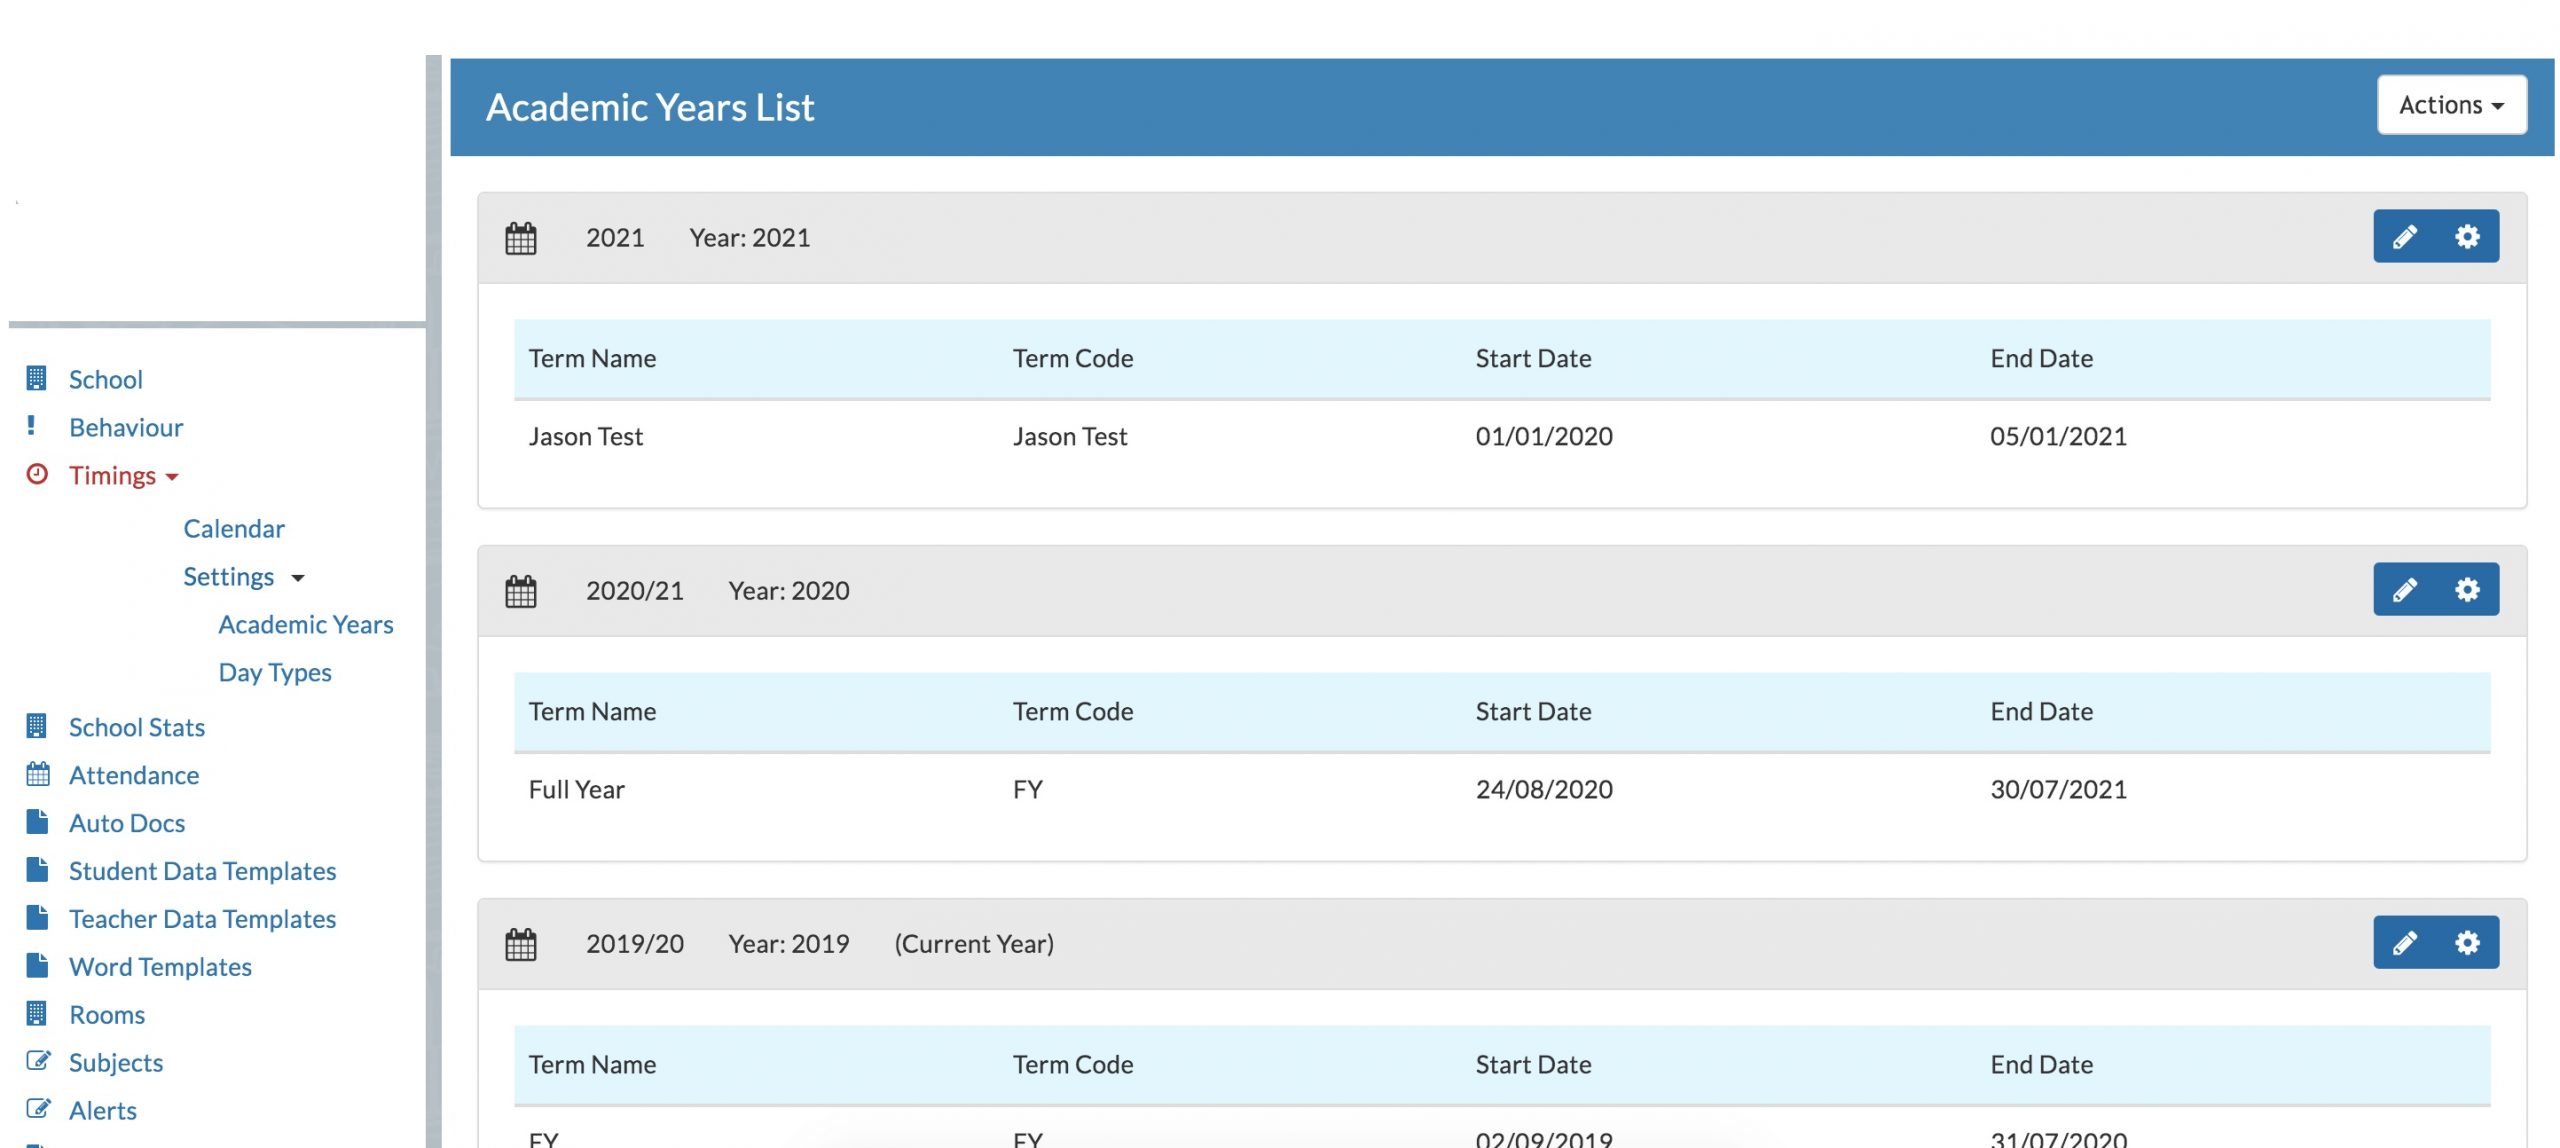
To do this click Settings > Timings > Academic Year > click on the Gear icon as in the screenshot below.

This will display a dialog box which allow you to move to the different academic year as ‘All Users’ or Just Me’

Some final thoughts:
I’ve followed all these steps but when I view a teacher’s timetable tab, it’s blank.
Once you have completed and published your timetable, the day types must be applied to the calendar in order for the timetable to be visible. It is only possible for support to create day types and you must then apply them to the calendar. Contact support on 01-5549628 and they will be able to create day types for you in a couple of minutes.
I’ve published while in 2019/20 into 2019/20!
If you’re unsure whether you’ve published into the same year, you can easily check by going to settings > system settings > scroll to the very bottom of the page. Here you will see the year the timetable was published from and which year it was published into. If you’re not ready for all users to see the timetable, move all users back into to 2019/20 (the current year), then republish the same file into 2020/21 (the next year).
Where does the 2019/20 academic year come from in the first place?
The next academic year is automatically created when you do your PPOD roll over, so it should be there for you already. You should not create your own academic year manually for the purposes of checking your timetable as this might cause issues further down the line.


